Getting started with Plantation 4.0
Getting started with Plantation 4.0
What is Plantation 4.0?
Plantation 4.0 is a cloud-based software platform which uses insights extracted from drone-collected imagery to enable Precision Agriculture in oil palm plantations . With the help of Plantation 4.0, you will be able to plan, monitor and analyse activities on your estates with a high level of precision to help you make better decisions.
What do I need to get started
All you need is a computer with internet access and stitched images (also known as an orthomosaic) of your plantation estate in google tiles format.
If you do not have aerial maps for your estate, you can either:
- contact us or other commercial drone operators to help you map your estate or
- fly your own drone yourself and use your prefered stitching software (many of our users use PIX4D Mapper) to stitch the images together to create your aerial maps.
You can check out our guide on how to capture the best quality images for mapping.
From there, upload the google tiles onto Plantation 4.0 to create your first map estate and you are now ready to start using Plantation 4.0!
How to use the Plantation 4.0 web app
Create an account
To create a account, go to the Plantation 4.0 website and click the “Sign in” button located in the upper right hand corner or head straight to the web app at https://plantation.garuda.io/
Interface overview
When you log in to Plantation 4.0, you will be taken to the Estates View page. Over here, you can see all the estate maps you uploaded on the platform, together with key metrics such as area, stand count (if calculated for the estate) and planting density for each estate. To start exploring your maps, just click on them.
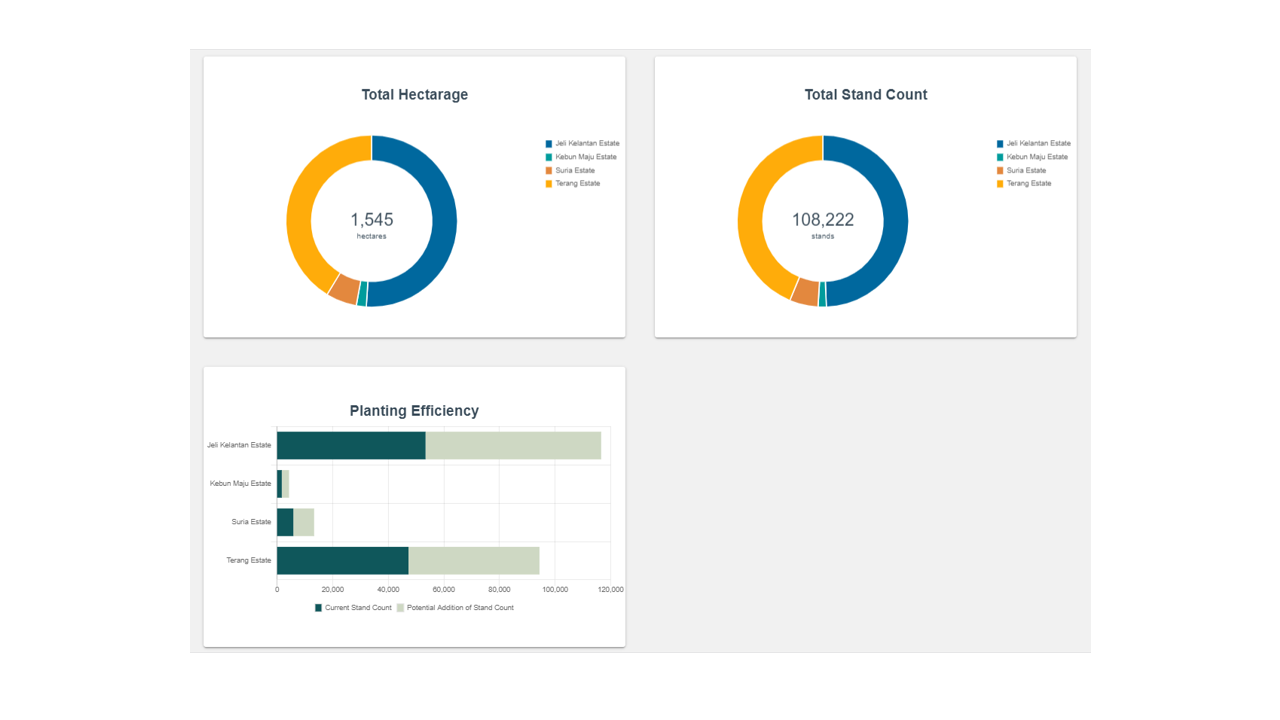
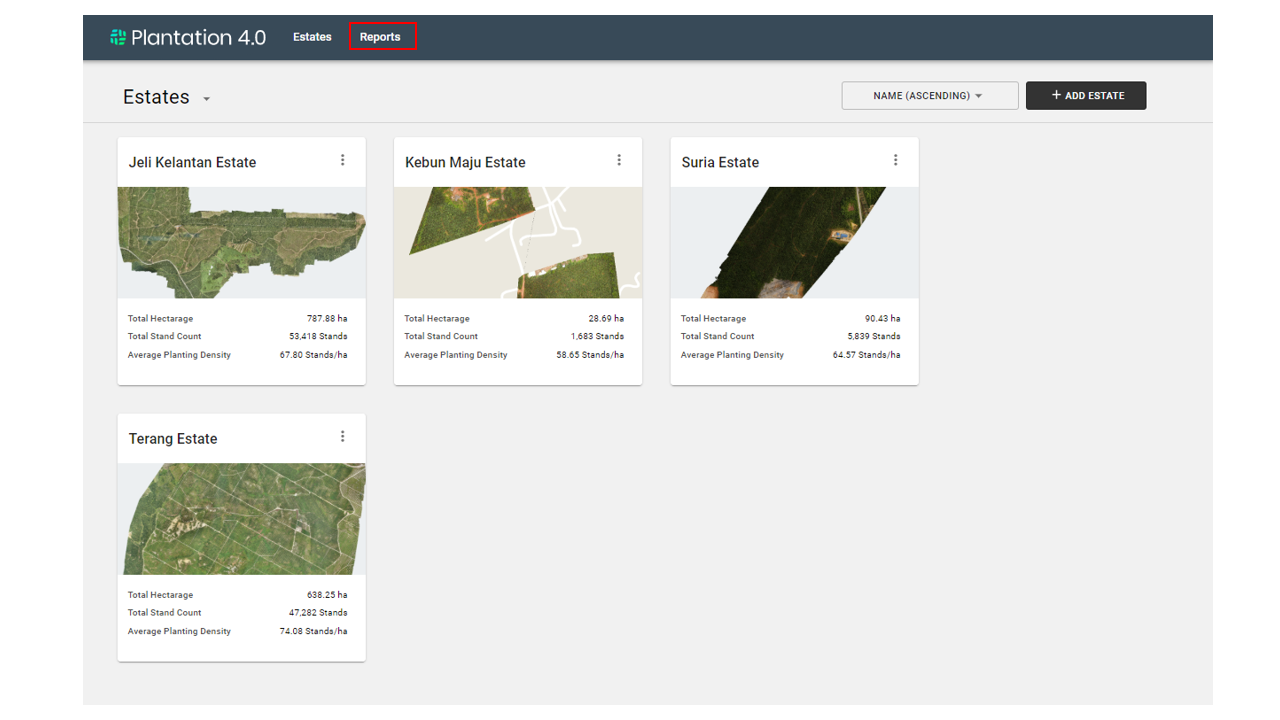 Click on the “Reports” tab to access a dashboard where you can retrieve more details into how your estates are performing across Estates and Blocks.
How to create my first map
To create your first estate map, you will need to prepare a stitched imagery (or orthomosaic) of your estate. The maps should either be in Google Tiles or GeoTiff format. They can be created with map stitching software such as PIX4D Mapper or geospatial processing libraries such as GDAL.
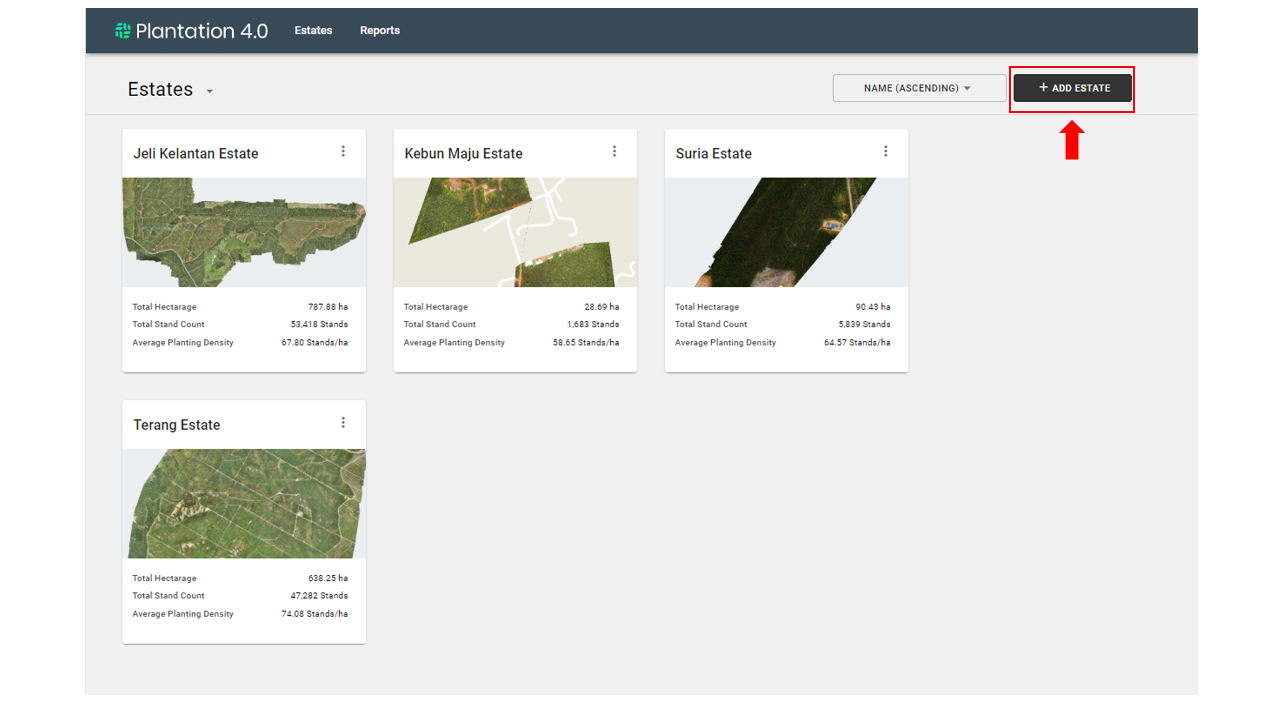
When you have the data ready, click on “Add Estate” button at the upper right corner:
 Select to upload map either in Google Tiles or GeoTiff format. Click “Next” and follow the instructions as prompted on the screen.

Depending on your internet connection, the upload time may take anywhere from a few minutes to an hour. If you upload your map in Google tile format, you will be able see it on the Estate View Page once the upload is complete.
For GeoTiff maps, it may take up to a day for your estate to be ready as it needs to be converted into tile map for optimized viewing over the internet.
How to create block boundaries for your estate
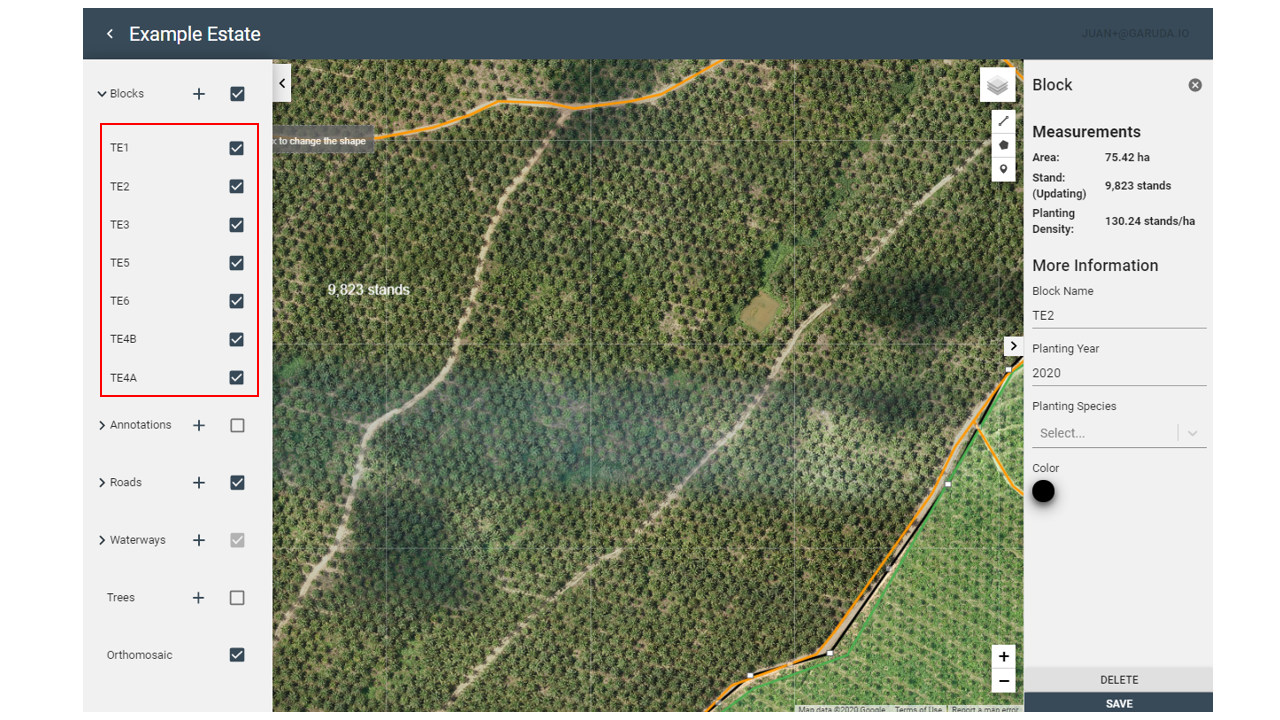
If you already have data defining the block boundaries of your estate in KML format, you can simply upload them onto your map estate by clicking on the + symbol beside “Blocks” to set up your block boundaries. Otherwise you can manually draw the block boundaries yourself by clicking on the “draw block” button.
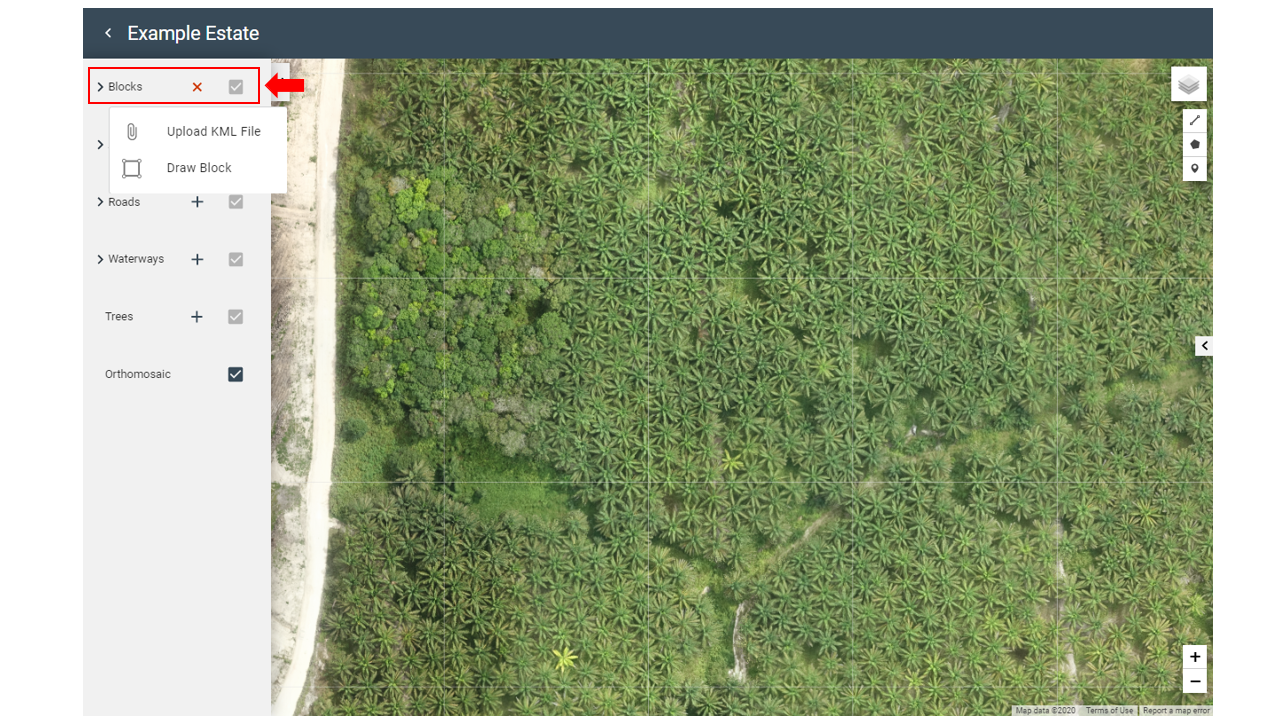
After creating your block boundaries, you can provide further information about them such as the name of the block and planting year as well as adjust the borders by clicking on them directly on the map or on the Blocks dropdown list on the left sidebar.
How to create block boundaries for your estate
If you already have data defining the block boundaries of your estate in KML format, you can simply upload them onto your map estate by clicking on the + symbol beside “Blocks” to set up your block boundaries. Otherwise you can manually draw the block boundaries yourself by clicking on the “draw block” button.
After creating your block boundaries, you can provide further information about them such as the name of the block and planting year as well as adjust the borders by clicking on them directly on the map or on the Blocks dropdown list on the left sidebar.
Adding annotations to your map estate
You can mark out important locations in your estates in three ways, as a point, line or a polygon by clicking on the + symbol beside “Annotations”. Provide more information about them by filling in the “Name” and “Description” field on the right sidebar.
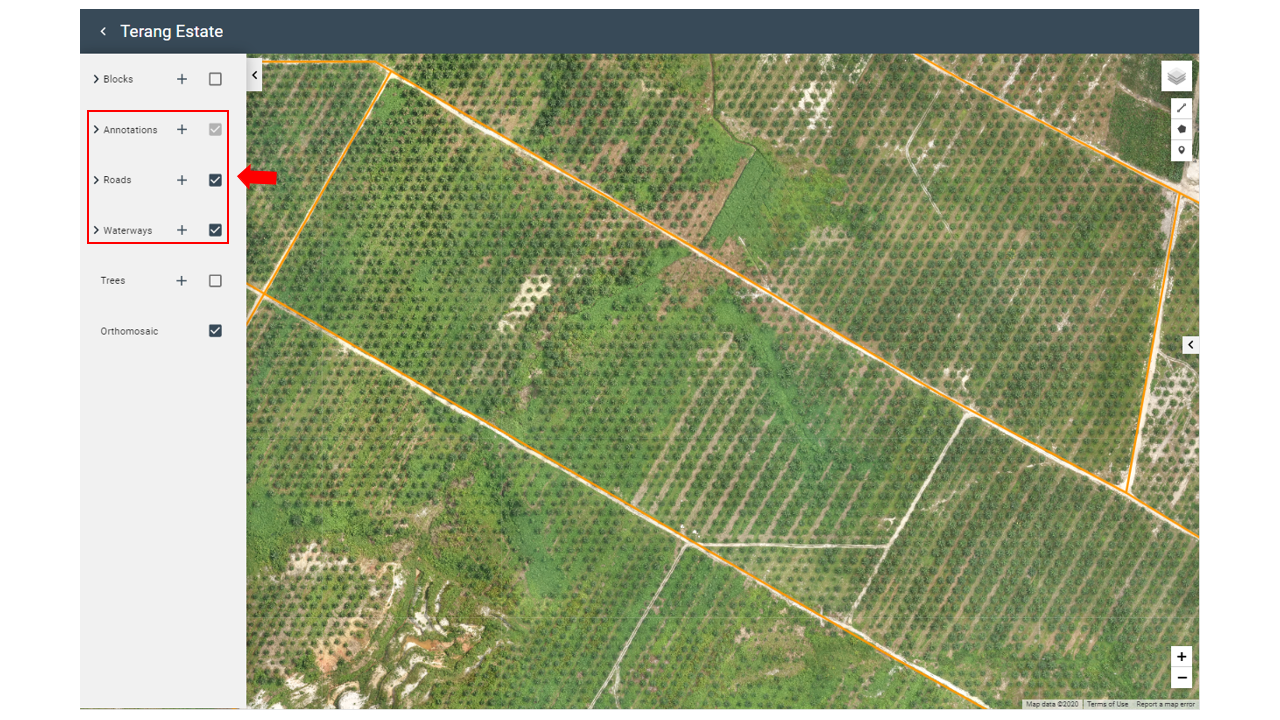
In addition, you can also enrich your map by adding roads and waterways layers. You can do this by clicking on the + symbol beside “Roads” and “waterways” respectively. Similarly, you can also provide more information by filling in the fields on the right sidebar.
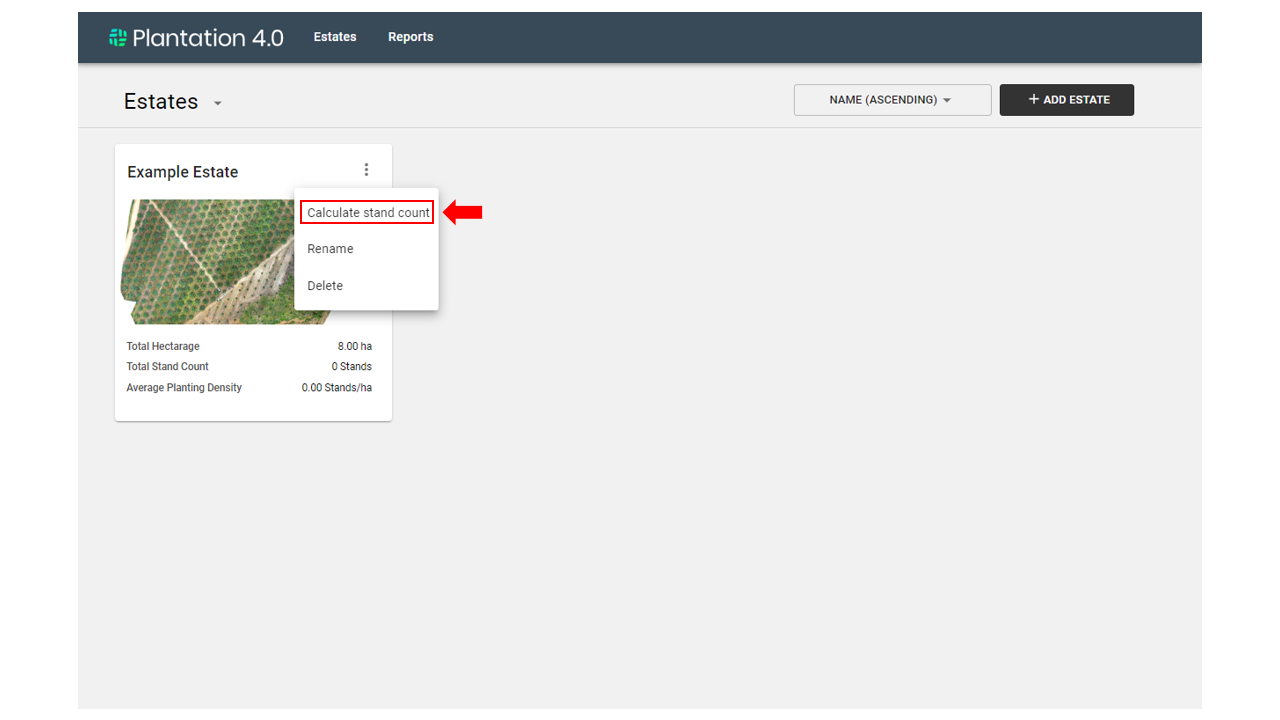
Calculate stand count
To calculate the number of oil palm stands in your estate map, go to the Estates Tab, click on the ⋮ button on the Estate where you want to run the tree count and click on “calculate tree count”. You will be directed to an order form where you can fill in your credit/debit card details to complete your purchase. Your request will be processed once the order is submitted. You will receive an email notification when the tree count is completed (usually with 2-3 hrs depending on estate size).
If you do not have a credit or debit card, you can also contact us directly to make the order.